Have you ever tried to create a print piece but the pictures you selected came out a bit fuzzy? Or, have you uploaded some great images to your blog or website and noticed they take forever to load in? The problem is that your images are not properly optimized. Let’s fix that!
Contents:
- What is image optimization?
- What types of images require optimization?
- What do DPI, PPI and Resolution mean?
- How can I tell what size, resolution, etc. my image is?
- How do I optimize my images for different uses?
- What tools are out there that can help me with this?
What is image optimization?
Simply put, optimizing an image means that you are setting the optimum resolution to an image for its particular application. For print, this means that the image is sharp without any pixelization or fuzziness. For the web, this means that the image looks great on desktops and phones at the smallest file size possible to ensure a quick load time.
What types of images require optimization?
In the design world, there are basically two types of images – raster and vector.
Raster images are made up of hundreds or thousands of tiny colored squares called dots or pixels assembled in a grid – or bitmap – that creates the image. The most recognizable raster image would be a photograph. Common filetypes include GIF, JPG, PNG, BMP and TIFF.

This photograph is made up of tiny different colored bits on a grid that you can see when you zoom in.
Vector images use mathematical formulas to define shapes like circles, polygons, lines and curves. Because of this, vector images can be resized bigger or smaller without changing the image’s quality. Business logos are often created in vector format for its versatility. Common filetypes include AI, EPS and SVG.

Because the shapes are generated mathematically, a vector image doesn’t blur or pixelate.
What do DPI, PPI and Resolution mean?
A lot of folks try to use DPI, PPI and Resolution interchangeably, but if you understand the differences, resizing and optimizing images makes a whole lot more sense. Here’s a breakdown:
DPI – means Dots Per Inch. This is the number of dots printed per inch on a piece of paper and is a measure of a printer’s quality. The higher the DPI number, the sharper the printed image will be.
Resolution – digital images are measured in pixels, so an image’s dimensions could be 2048 pixels wide and 1536 pixels high. Resolution describes how much of the picture is displayed within a specific size. The higher the resolution, the smaller the image.
PPI – means Pixels Per Inch. This is the number of pixels contained within an inch when an image is displayed on screen. PPI is the measurement unit of resolution.
When you combine the dimension (pixel measurement) with PPI (pixels/inch), you can then know the physical dimensions of an image when printed out.
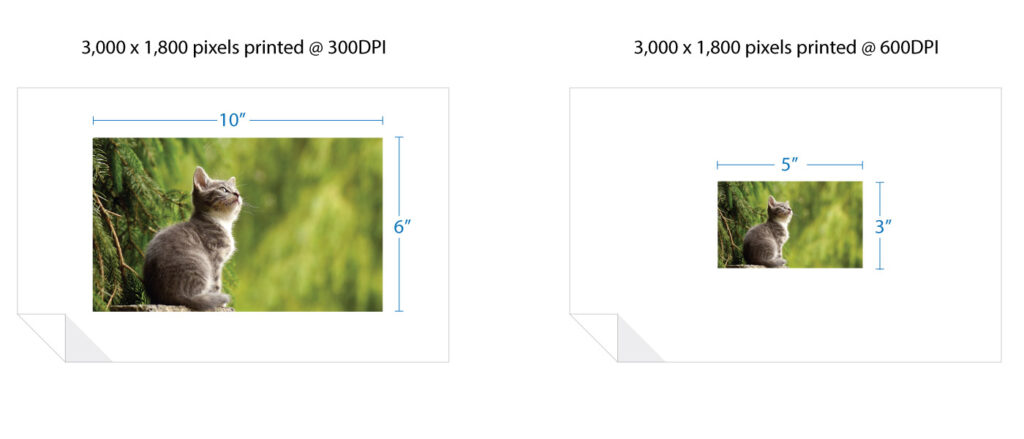
Example: An image that’s 3,000 pixels wide x 1800 pixels tall set to 300 PPI will be 10 inches x 6 inches when printed out. If the image is set at 600 PPI, it will print out at 5 inches x 3 inches.
On a screen, a 200 pixel x 200 pixel image will always be just that. However, that image will appear bigger or smaller based on the resolution of the screen on which it’s viewed.
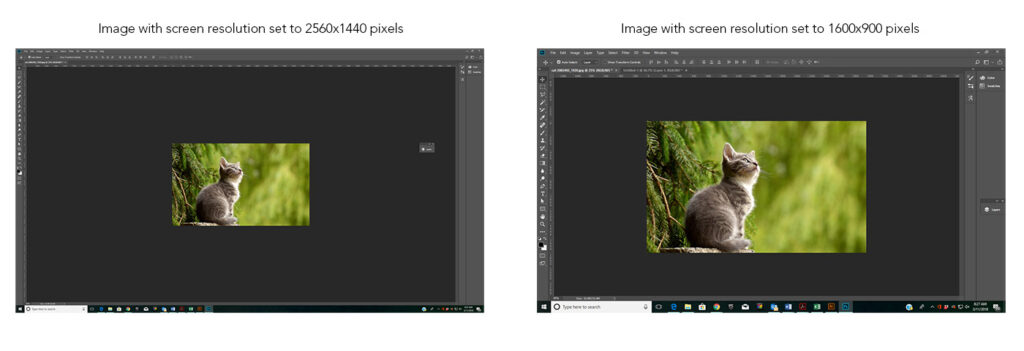
Example: The same size image will appear bigger or smaller on the same screen set at two different resolutions.
How can I tell what size, resolution, etc. my image is?
Unfortunately, you can’t tell just by looking at it on your computer screen. You can kind of get a sense of the image’s dimensions by checking the file size (typically the bigger the file size, the higher the resolution) but that’s not terribly accurate. To know the resolution, you’ll need to open the image file in an image editing program and look at its properties.

In the image above, taken from Photoshop, you can see that the dimensions in pixels are in a separate box from the PPI (resolution) and printed dimensions. Also note that when I change the resolution, the pixel dimensions don’t change, but the printed dimensions do.
How do I optimize my images for different uses?
There are a few rules of thumb for optimizing images for different purposes.
Optimizing for Print:
In most cases, print images should be a minimum of 300PPI at it’s printed size. So, if you want your photo to be 3 x 5 inches, the image’s dimensions should be at least 900 x 1,500 pixels. You can always drop in a bigger image and scale it down, but you can’t drop in a smaller image and scale it up without losing quality. It’s best to save your print image files in JPG or TIFF format.
Optimizing for Web:
Computer monitors and smart devices vary quite a bit in actual screen resolution, so PPI is kind of a useless metric when sizing and optimizing web images. Focus on the pixel dimensions instead. Just as you would for a printed image, you need to know what size you want the image to be and then resize accordingly. With the advent of responsive layouts and high quality retina displays, figuring this out is a bit trickier.
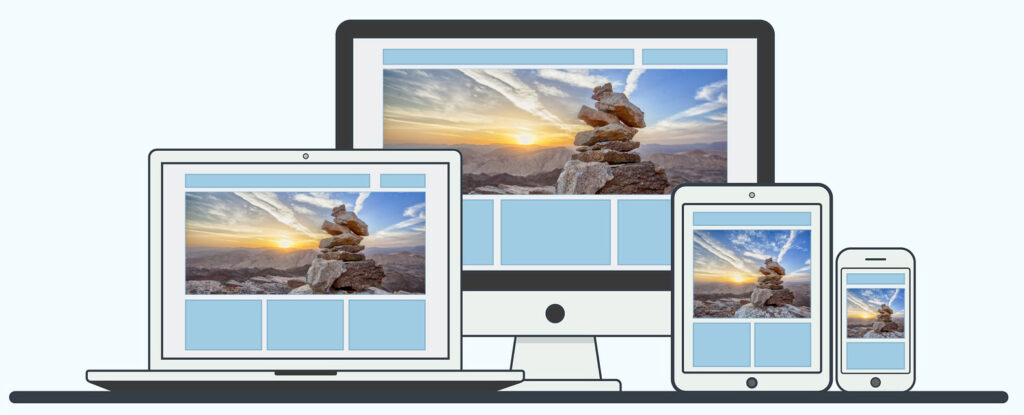
The images may look smaller on your phone or tablet, but there’s more than meets the eye with retina displays.
Retina and high-density displays on devices like smartphones and newer monitors have approximately 4x the pixel density than non-retina displays. What this means is that for your images to appear sharp on a retina-type display, you’ll want to double the height and width in pixels of your image. For example, if the image area is 200 x 200 pixels, you’ll want to size your image at 400 x 400 pixels. But remember, you need to start out with an image that’s bigger than the final size – changing the pixel size from 200 to 400 does nothing to increase the sharpness of the image.
When you place this larger image into a smaller container, the pixel density of the image increases. Doubling the height and width will increase the image’s file size, so you’ll need to decide how much you want to sacrifice –quality or load time – for your images.
Web images are typically saved in GIF, JPG and PNG formats. Here are a few rules of thumb for deciding which file format to use:
GIF – typically used for images that have a limited number of colors and more illustrative elements. Not great for photos, but GIFs can be sequenced for animation.
JPG – most common for photos. You can adjust the quality of a JPG to try to reduce the file size, but I wouldn’t recommend going lower than 50% in terms of image quality.
PNG – typically reserved for images where there are partial or full transparencies. Great image quality, but you also get larger file sizes as a result.
What tools are out there that can help me with this?
Not everybody has Photoshop. It’s big and pricey with a lot of great features you’ll probably never use. I’ve selected a few below that do not require a Flash plugin that I would recommend for optimizing web images. You can use these for images you intend to print as well, just remember to multiply the printed dimensions by PPI to know what the pixel dimensions should be.
Photopia: https://www.photopea.com/
Canva: https://photo-editor.canva.com/
Fotor: https://www.fotor.com/
